English


Views: 0 Author: Site Editor Publish Time: 2025-07-23 Origin: Site


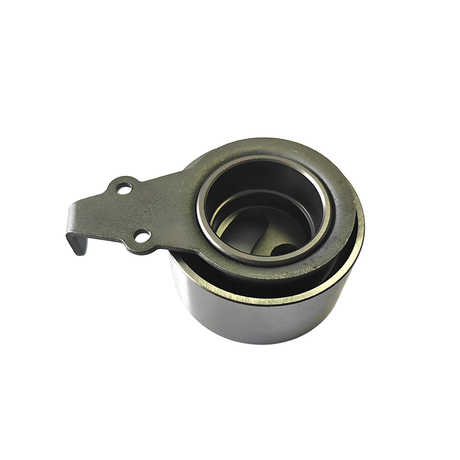
Non-standard bearings for automotive tightening wheels are customized bearings designed for special working conditions of tightening wheels. The use method must be standardized for the functional characteristics of the tightening wheels (such as adjusting belt tension, absorbing vibration, and bearing axial/radial composite load). Here are the detailed usage guides:
1. Preparation before installation
1. Bearing and accessories inspection
Appearance inspection: Make sure that the bearing is free of cracks, rust, burrs or oil stains. Special structures with non-standard designs (such as widened raceways and special cages) must be consistent with the drawings.
Check whether the tightening wheel arms, bolts, springs and other accessories are intact to avoid abnormal bearing stress caused by damage to the accessories.
Dimension matching: Check the matching tolerances of the bearing inner diameter, outer diameter, width and tightening wheel shaft and hub (usually H7/h6 or H7/k6 transitional matching).
Non-standard bearings may involve special clearances (such as C3 and C4 groups), and it is necessary to measure whether the actual clearance meets the design requirements through a dial (generally, the radial clearance is 0.05~0.15mm).
2. Cleaning and lubrication
Cleaning treatment: Use a dust-free cloth to wipe the inner and outer rings, raceways and cages of the bearing to remove anti-rust oil or impurities.
Clean the tightening shaft and hub mounting surface to ensure no metal chips, paint residue or burrs.
Lubrication selection: Use grease according to working conditions: High temperature environment (such as the engine periphery): Use lithium-based composite grease (drop point ≥260℃), such as Shell Gadus S2 V220C.
High load conditions: Use extreme pressure grease (such as Mobilith SHC 460) and contains molybdenum disulfide additive.
Low speed heavy load: high viscosity grease (NLGI level 3) is selected, such as Klübersynth BH 72-102.
Lubrication quantity control: The bearing free space is filled with 30%~50%, to avoid excessive temperature rise.
2. Installation steps
1. Bearing heating and assembly
Heating method: Induction heater: Heat the bearing to 80~100℃ (if non-standard bearings contain plastic cages, the temperature must be ≤120℃), and quickly put it into the shaft neck after insulation for 5 minutes.
Oil bath heating: immerse the bearing in 100# transmission oil, heat it to 80~90℃, remove it and wipe the oil stains with a dry cloth before assembly.
Cold installation restrictions: It is prohibited to directly hit the inner or outer ring of the bearing with a hammer. A special press sleeve (material is 45# steel, hardness HRC28~32) must be used to slowly press in through the press.
Pressure force control: Select the pressure according to the bearing size (for example, the 6204 bearing requires about 5~10kN) to avoid excessive pressure causing raceway deformation.
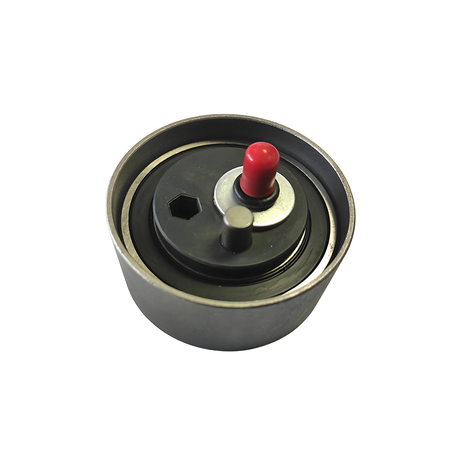
2. Tightening wheel assembly
Spring installation: Put the torsion spring or tension spring into the tightening wheel arm in the design direction to ensure that the end of the spring is completely engaging with the wheel arm slot.
Pre-tighten the spring to design torque (such as 15~20N·m), use a torque wrench to verify.
Wheel positioning: Put the assembled bearing-tightening wheel assembly into the engine bracket and fix it with bolts (refer to the maintenance manual for torque values, such as M8 bolts, 25~30N·m).
Pay attention to the axial clearance adjustment of the bearing during installation: by adding or decreasing the gasket or rotating the adjustment nut, the axial clearance is controlled at 0.1~0.3mm (measured with a feeler gauge).
3. Run and debug
1. Initial inspection
Manual rotation test: Slowly rotate the tightening wheel to check whether the bearing rotates flexibly and has no stagnation, abnormal noise or vibration.
Measure the starting torque: Use a torque wrench to rotate the wheel body, and the starting torque should be ≤0.5N·m (if non-standard bearings contain pretension structures, the torque value may be higher).
Belt tension verification: Use a belt tension gauge (such as Gates Sonic Tension Meter) to measure belt tension to ensure compliance with the design range (such as generator belt tension is usually 300~500N).
If the tension is insufficient, adjust the tensioning wheel bolt or spring pretension; if the tension is too large, check whether the bearing clearance is too small.
2. Dynamic monitoring
Temperature monitoring: After running for 1 hour, use an infrared thermometer to measure the temperature of the outer ring of the bearing, and the normal temperature rise should be ≤40℃ (the ambient temperature +40℃ is the upper limit).
If the temperature rises too high, check whether the lubrication is sufficient, whether the installation is skewed or whether the belt tension is too high.
Vibration analysis: Use a vibration analyzer (such as Fluke 810) to detect the bearing vibration frequency, mainly focusing on: outer ring fault: frequency is bearing speed × number of balls (such as speed 1500rpm, 8 balls, fault frequency 200Hz).
Cage failure: The frequency is 0.4~0.5 times the bearing speed.
The vibration value should be ≤2.8mm/s (ISO 10816-3 standard). If the bearing is exceeded, it must be removed and inspected.
4. Maintenance and replacement
1. Regular maintenance
Lubrication supplement: Replenish grease every 20,000 kilometers or 1 year (refer to the model manual for specific cycles), inject new grease from the nozzle with a butter gun until the old grease is squeezed out from the sealing ring.
Avoid mixing different brands of greases to prevent chemical incompatibility and performance degradation.
Sealing inspection: Check whether the bearing seal ring (such as rubber lip seal or metal dust cover) is intact and has no cracks or fall off every time it is maintained.
If the seal fails, the bearings need to be replaced immediately to prevent dust or moisture from entering and causing early failure.
2. Fault judgment and replacement
Common faults: abnormal noise: bearing raceways or balls are worn, resulting in periodic 'click' sound.
Vibration: The cage breaks or the balls peel off, causing the vibration value to exceed the standard.
Excessive temperature rise: lubrication failure or installation skew, bearing jamming signs.
Replacement process: Loosen the tensioning wheel bolts and release belt tension.
Use the pulling tool to remove the tightening wheel assembly (care to protect the journal surface).
Use a press to press out the old bearings and clean the journals and hubs.
Follow the installation steps to reassemble the new bearing and debug to design parameters.
5. Precautions for use of non-standard bearings
Avoid mixing: The size, clearance or material of non-standard bearings may be different from standard parts, and standard bearings are strictly prohibited.
Anti-error installation design: Some non-standard bearings will distinguish the installation direction through special markings (such as color coding, laser engraving), and must be strictly assembled according to the mark.
Transportation protection: Non-standard bearings may contain precision structures (such as ceramic balls). They must be fixed with a special packaging box during transportation to avoid collision and deformation.
Tool matching: Use non-standard bearing special tools (such as special-shaped press sleeves, customized pull-ups) to prevent tool mismatch from bearing damage.